

Kubernetes is an open-source container management tool that automates container deployment, scaling, and load balancing.
Features of Kubernetes
Following are some of the important features of Kubernetes.
Continues development, integration, and deployment
Containerized infrastructure
Application-centric management
Auto-scalable infrastructure
Environment consistency across development testing and production
Loosely coupled infrastructure, where each component can act as a separate unit
Higher density of resource utilization
Predictable infrastructure which is going to be created
Kubernetes - Cluster Architecture
As seen in the following diagram, we have the master installed on one machine and the node on separate Linux machines.
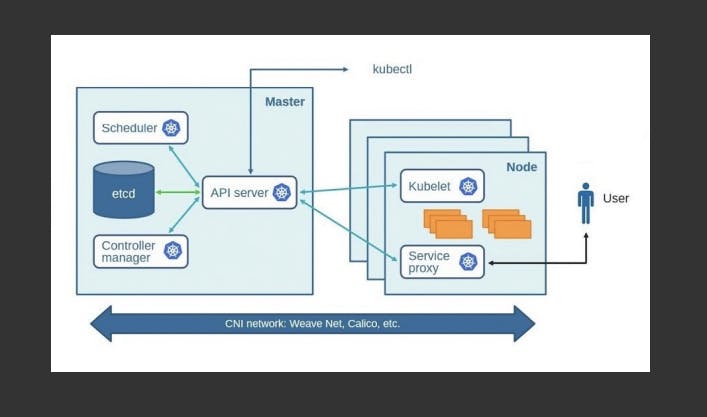
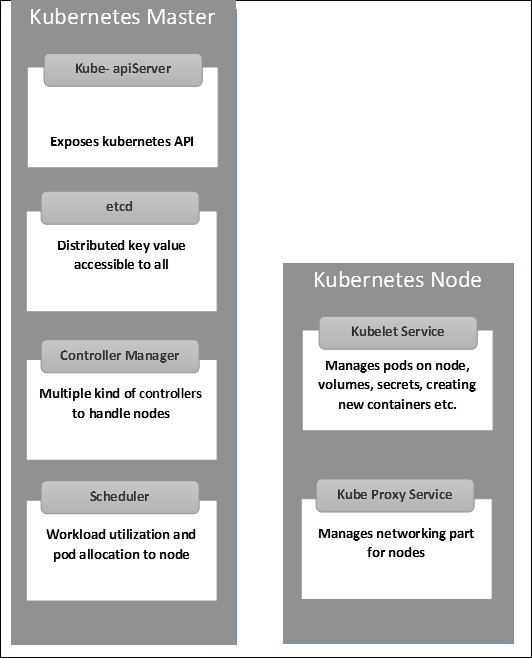
Master Components
How do containers run in Kubernetes?
Containers run through CRI which is available in Kubernetes. CRI stands for Container Runtime Interface.
We can use docker/rkt as a container service for Kubernetes.
CRI-O: Container Runtime Interface implements K8s and alternative to containerd.
Docker: a tool to run the container.
containerd: It is available as a daemon for Linux and Windows. It manages the complete container lifecycle of its host system, from image transfer and storage to container execution and supervision to low-level storage to network attachments and beyond.
etcd: It is a database that stores the running container information like ip, nodes, pods, configs, rolls, etc in the form of key-value pair.
API Server: It is used to authenticate users, validate requests, retrieve data, update ETCD, and communicate with other components of clusters.
Controller Manager: Continuously monitors various components of the cluster and works towards managing/restoring to the desired state. The controller manager runs different kinds of controllers to handle nodes, endpoints, etc.
Following is the list of important built-in Kubernetes controllers.
Deployment controller
Replicaset controller
DaemonSet controller
Job Controller (Kubernetes Jobs)
CronJob Controller
endpoints controller
namespace controller
service accounts controller.
Node controller
Node Controller: It communicates with the Kube API server and manages nodes every 5 seconds.
It checks again for 40 seconds and then marks it as unreachable. After 5 minutes it replaces.
Replication Controller: It is responsible for monitoring states for the replica set. It ensures that desired no. of pods is available at the required time.
Note: cronjob, deployment controller, persistent volume protection, binder, etc. [All included in Kube Controller Manager]
Scheduler: The Kube scheduler is responsible for scheduling pods on a worker node.
-> It is a controller that listens to pod creation events in the API server.
-> The scheduler has two phases. Scheduling cycle and Binding cycle. Together, it is called the scheduling context. The scheduling cycle selects a worker node and the binding cycle applies that change to the cluster.
-> The scheduler always places the high-priority pods ahead of the low-priority pods for scheduling.
Node Components
Docker: The first requirement of each node is Docker which helps in running the encapsulated application containers in a relatively isolated but lightweight operating environment.
Kubelet Service: It is on the worker node and registers the node with the pod.
Monitors the status of pods and reports to the Kube API server.
It interacts with etcd store to read configuration details and the right values. This communicates with the master component to receive commands and work. The kubelet process then assumes responsibility for maintaining the state of work and the node server. It manages network rules, port forwarding, etc.
Kubernetes Proxy Service: This is a proxy service that runs on each node and helps in making services available to the external host. It helps in forwarding the request to the correct containers and is capable of performing primitive load balancing. It makes sure that the networking environment is predictable and accessible and at the same time, it is isolated as well. It manages pods on nodes, volumes, secrets, creating new containers’ health checkups, etc.
Pods: A pod is a collection of containers and their storage inside a node of a Kubernetes cluster. It is possible to create a pod with multiple containers inside it. For example, keeping a database container and data container in the same pod.
Kubectl controls the Kubernetes Cluster. It is one of the key components of Kubernetes which runs on the workstation on any machine when the setup is done. It can manage the nodes in the cluster.
Kubectl commands are used to interact and manage Kubernetes objects and the cluster.
Services: It helps to connect our applications to other applications or databases etc.
Installation & Configuration of Kubernetes
Create two instances in AWS. One will be the master node and another will be the worker node.
Connect both instances.
Install docker in both instances.
$ sudo apt update -y
$ sudo apt install docker.io -y
- If the docker service not running then start the service.
$ sudo systemctl status docker
$ sudo systemctl start docker
- If your instance restarted then we have to enable the service.
$ sudo systemctl enable docker
Note: When we are installing docker, containerd also installs.
Kubeadm Installation:
$ sudo curl -fsSLo /usr/share/keyrings/kubernetes-archive-keyring.gpg https://packages.cloud.google.com/apt/doc/apt-key.gpg
$ echo "deb [signed-by=/usr/share/keyrings/kubernetes-archive-keyring.gpg] https://apt.kubernetes.io/ kubernetes-xenial main" | sudo tee /etc/apt/sources.list.d/kubernetes.list
Again we have to update both instances.
$ sudo apt update -y

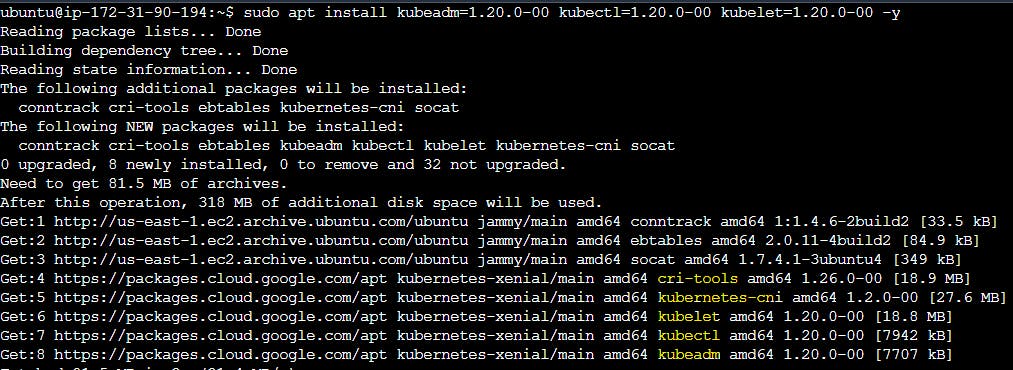
- Install kubeadm, kubectl, kubelet in both instances
$ sudo apt install kubeadm=1.20.0-00 kubectl=1.20.0-00 kubelet=1.20.0-00 -y
Note: Kubernetes setup is ready in both instances but both instances are not connected. So we have to connect both instances.
Master Node
- Go to the master node and switch to the root user.
$ sudo su

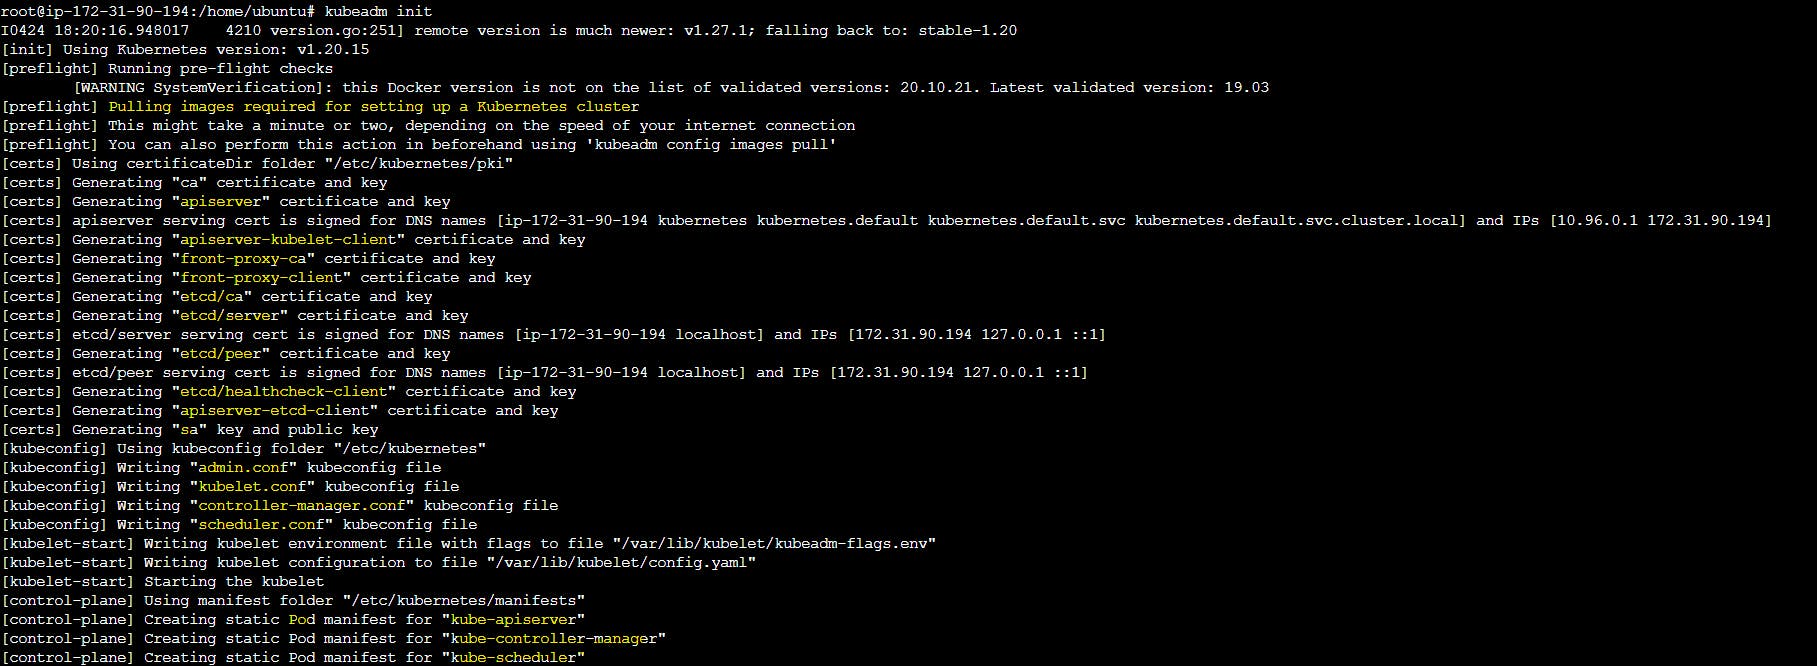
- Start the Kubernetes cluster in the master node after switching to the root user.
$ kubeadm init
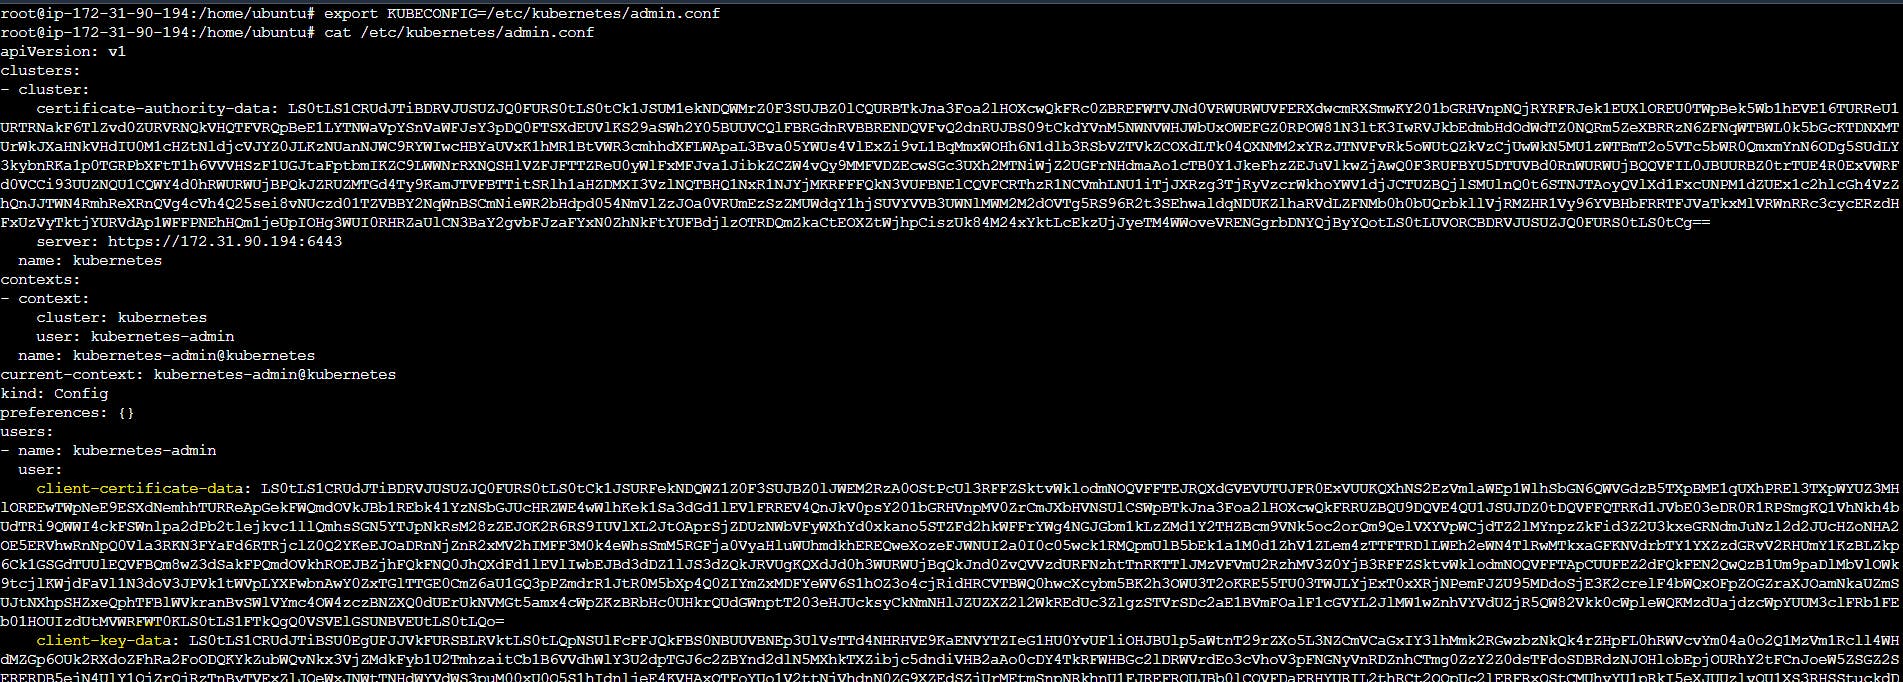
- Export kubeconfig.
$ export KUBECONFIG=/etc/kubernetes/admin.conf
/etc/kubernetes/admin.conf - this admin.conf file has key which is used to connect to the worker node.
- To finish the setup in the master machine apply the below file and create a network.
$ kubectl apply -f https://github.com/weaveworks/weave/releases/download/v2.8.1/weave-daemonset-k8s.yaml

- Using kubeadm generate a token to join this cluster.
$ kubeadm token create --print-join-command

Worker Node :
- Go to the worker node and switch to super(root) user
$ sudo su
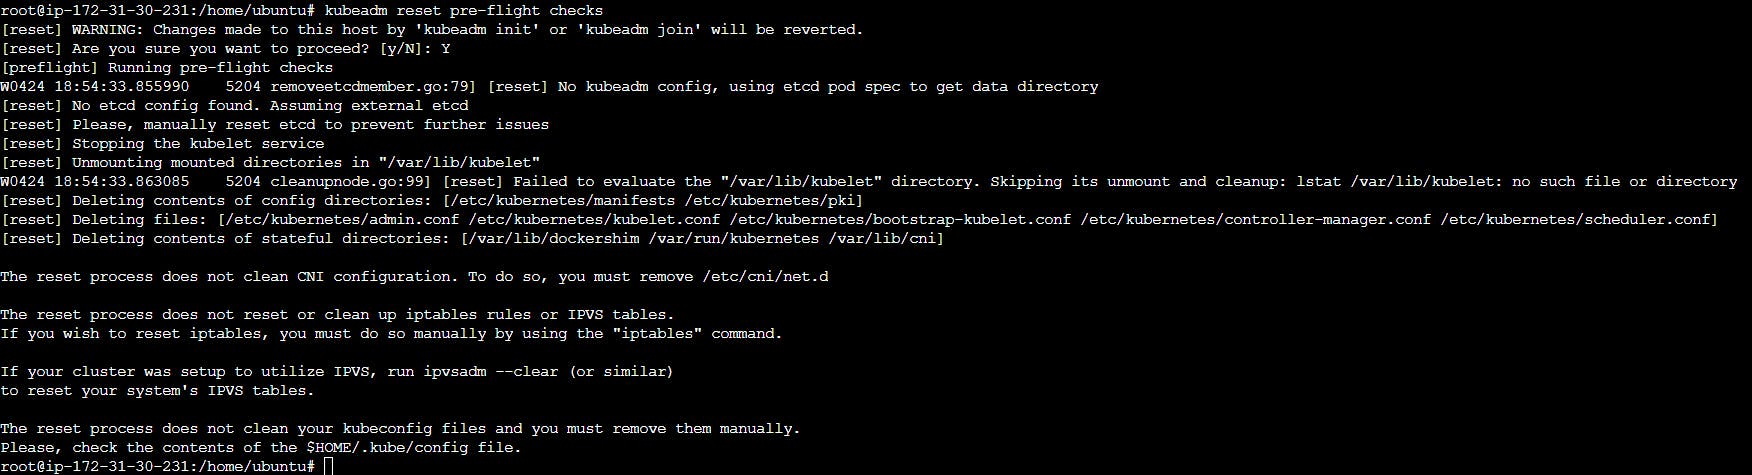
- Reset pre-flight checks to join cluster freshely
$ kubeadm reset pre-flight checks
Points to Remember: Don't initialize kubeadm in the worker node by mistake otherwise your worker node will become the master node.
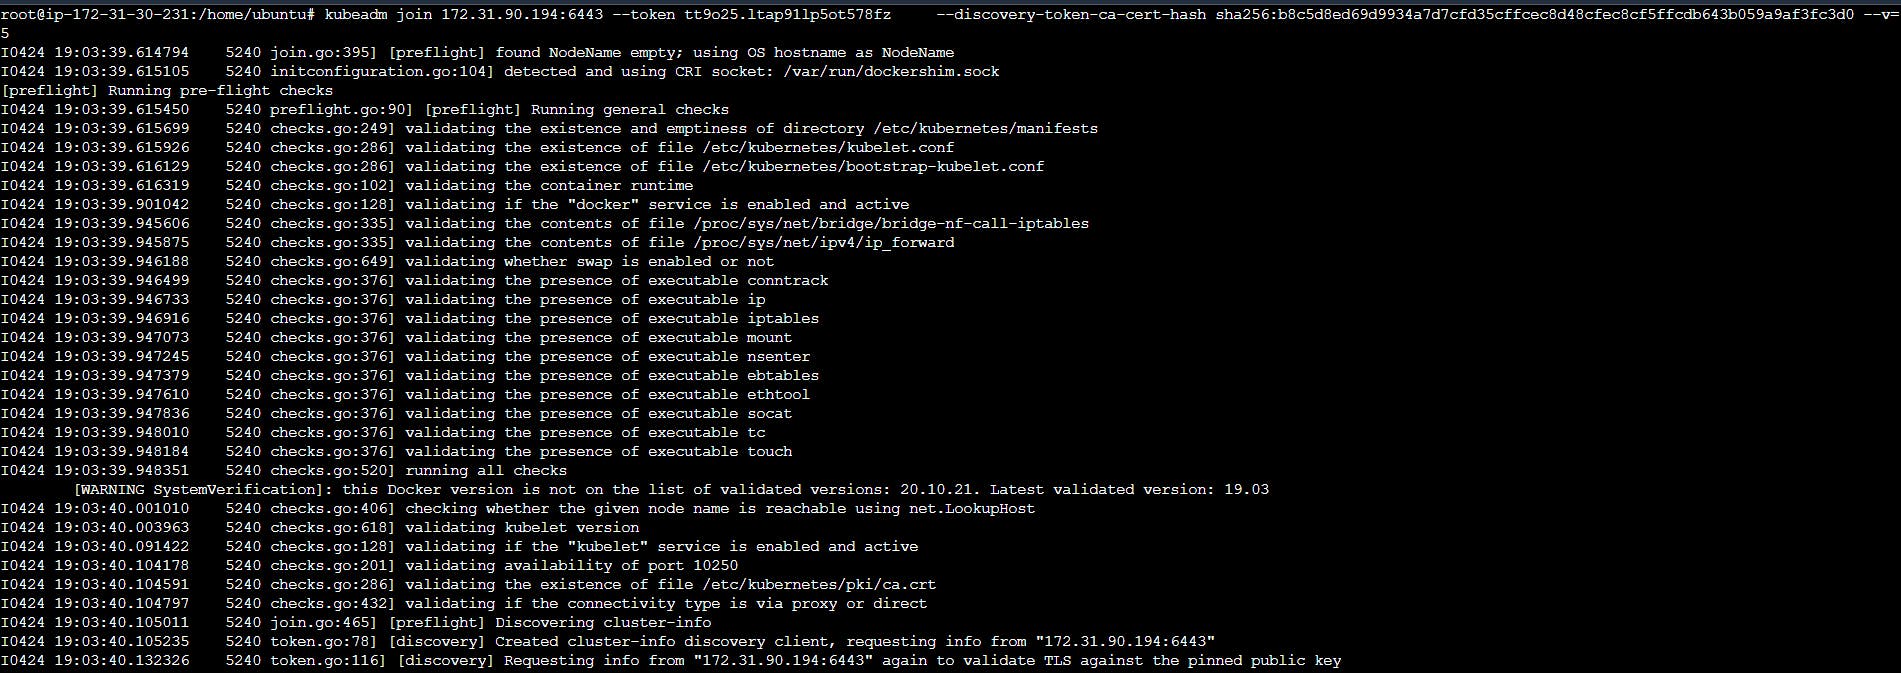
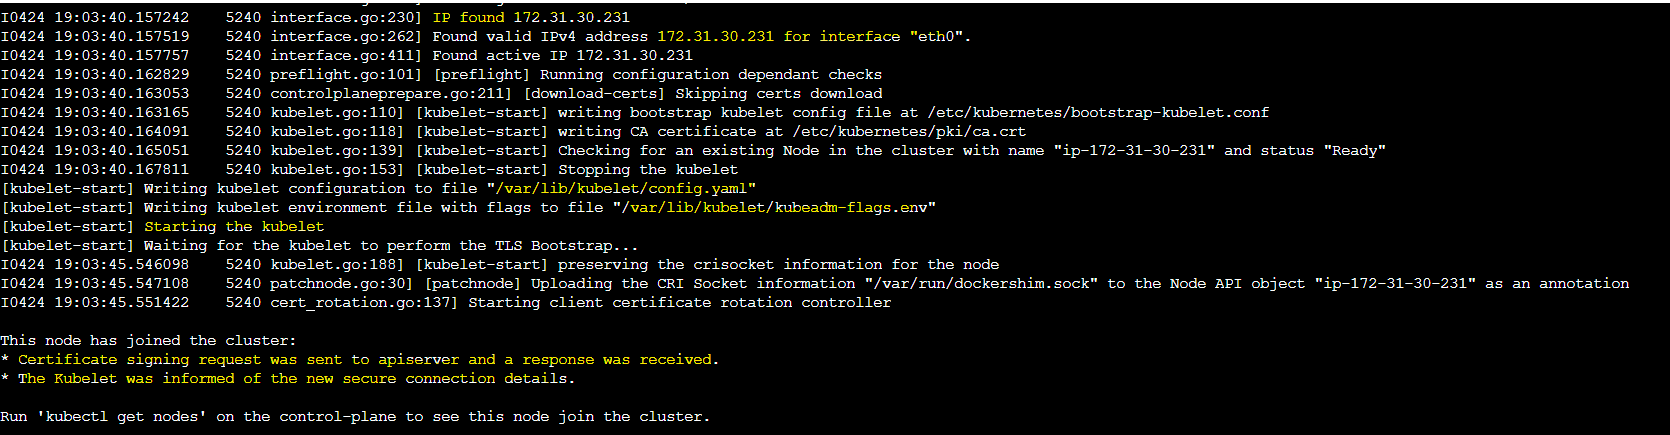
- Copy the token from the Master node and paste it to the worker node, also don't forget to expose the port by adding it to the security group.
Note: With tokens, we have to give a version flag also.( --v=5)
On Master Node:
- Go to the master node and check the nodes.
$ kubectl get nodes
Before connection with worker node -

After connection with the worker node -

Thank you for reading this Blog. Hope you learned something new today! If you found this blog helpful, please share it with others.