


Table of contents
Security Group
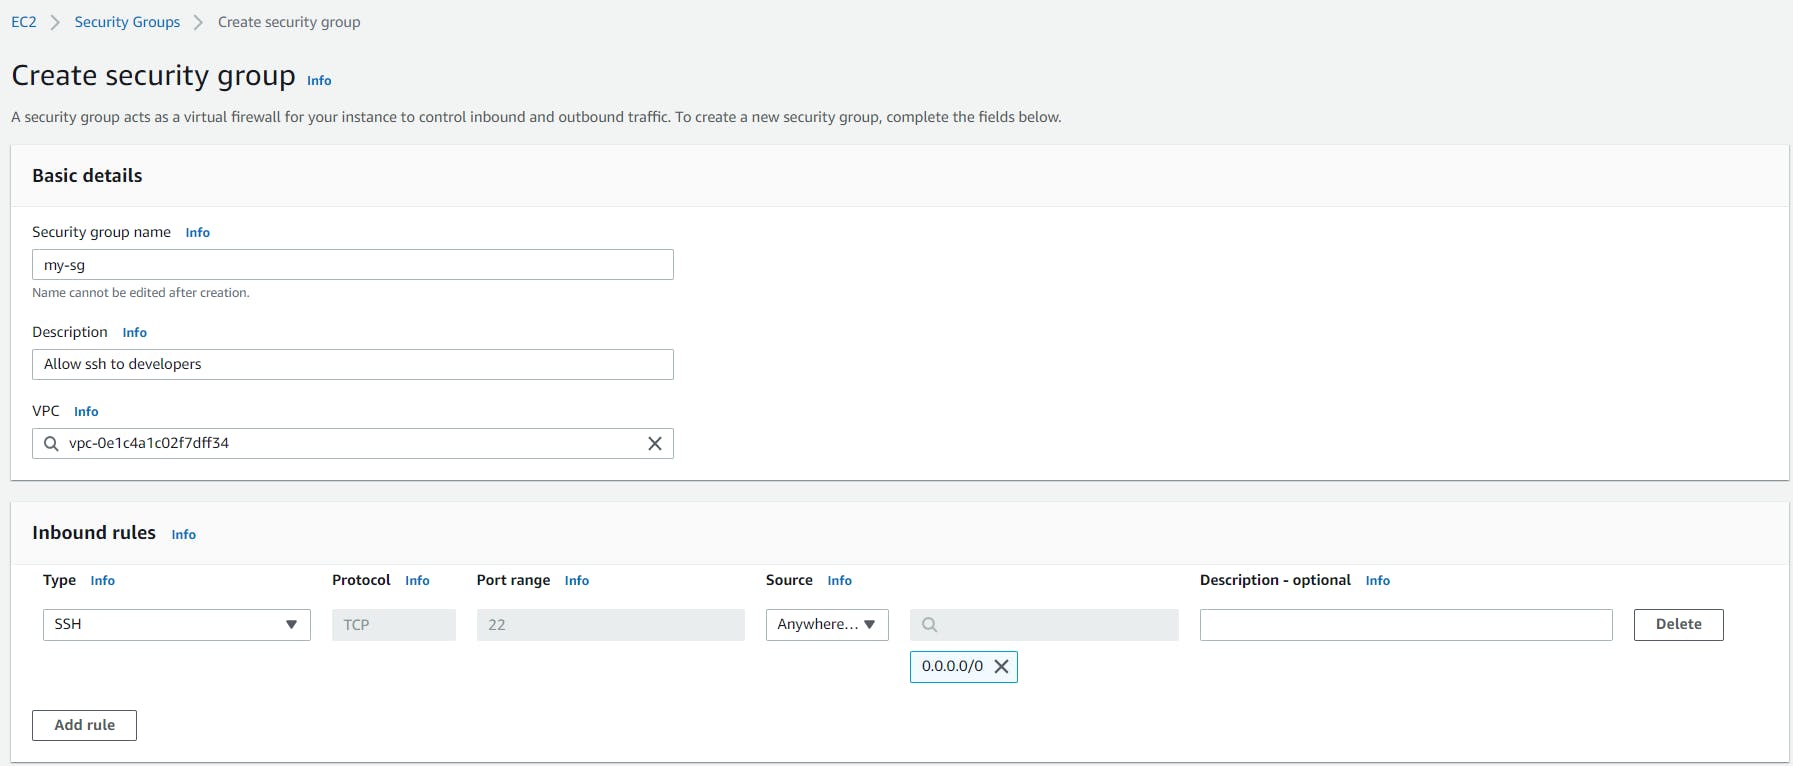
SG is a firewall that lives in front of your EC2 instance. We can configure traffic in and out of the security group. And, we can only write rules to allow traffic not to deny traffic.

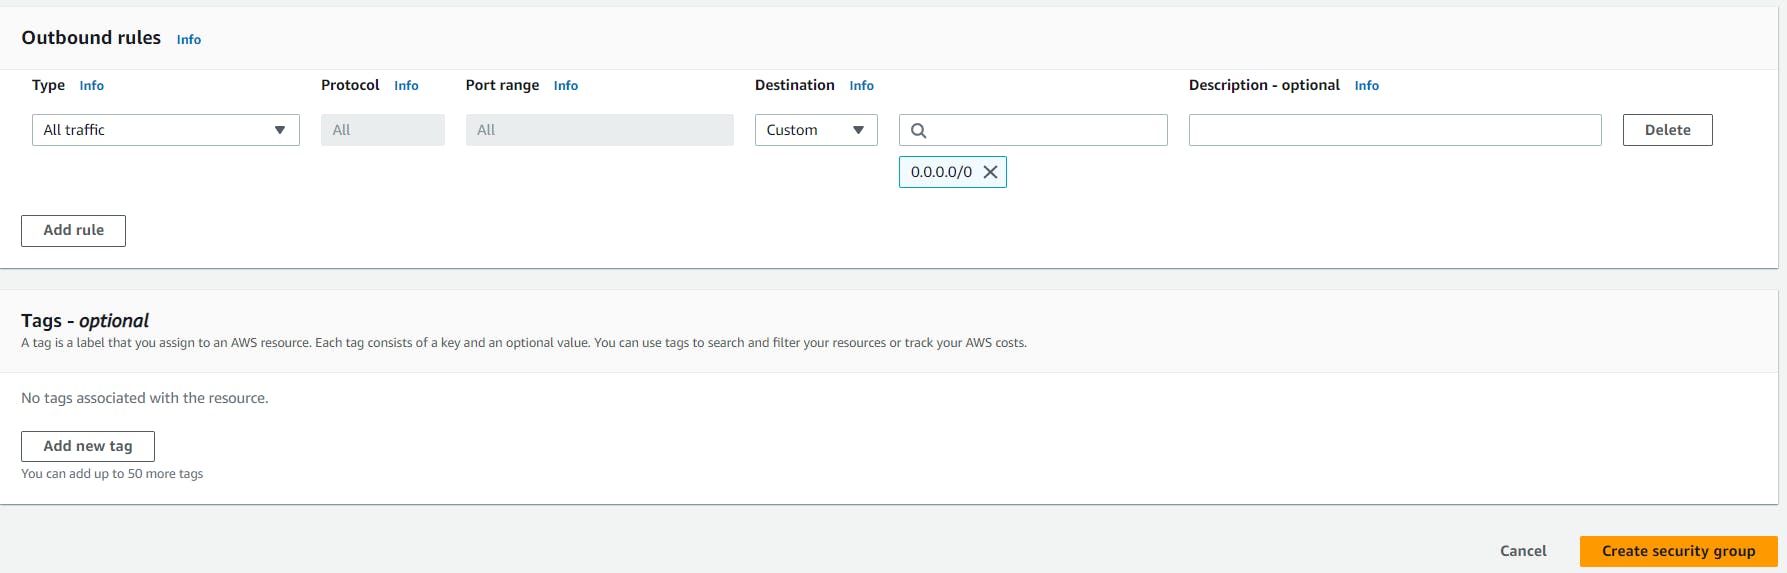
Let's add inbound and outbound rules in the Security Group.
Step 1: Log in to your AWS account.
Step 2: Navigate to Security Group and click on the "Create security group" button.
Step 3: Enter details and click on "create security group" button.
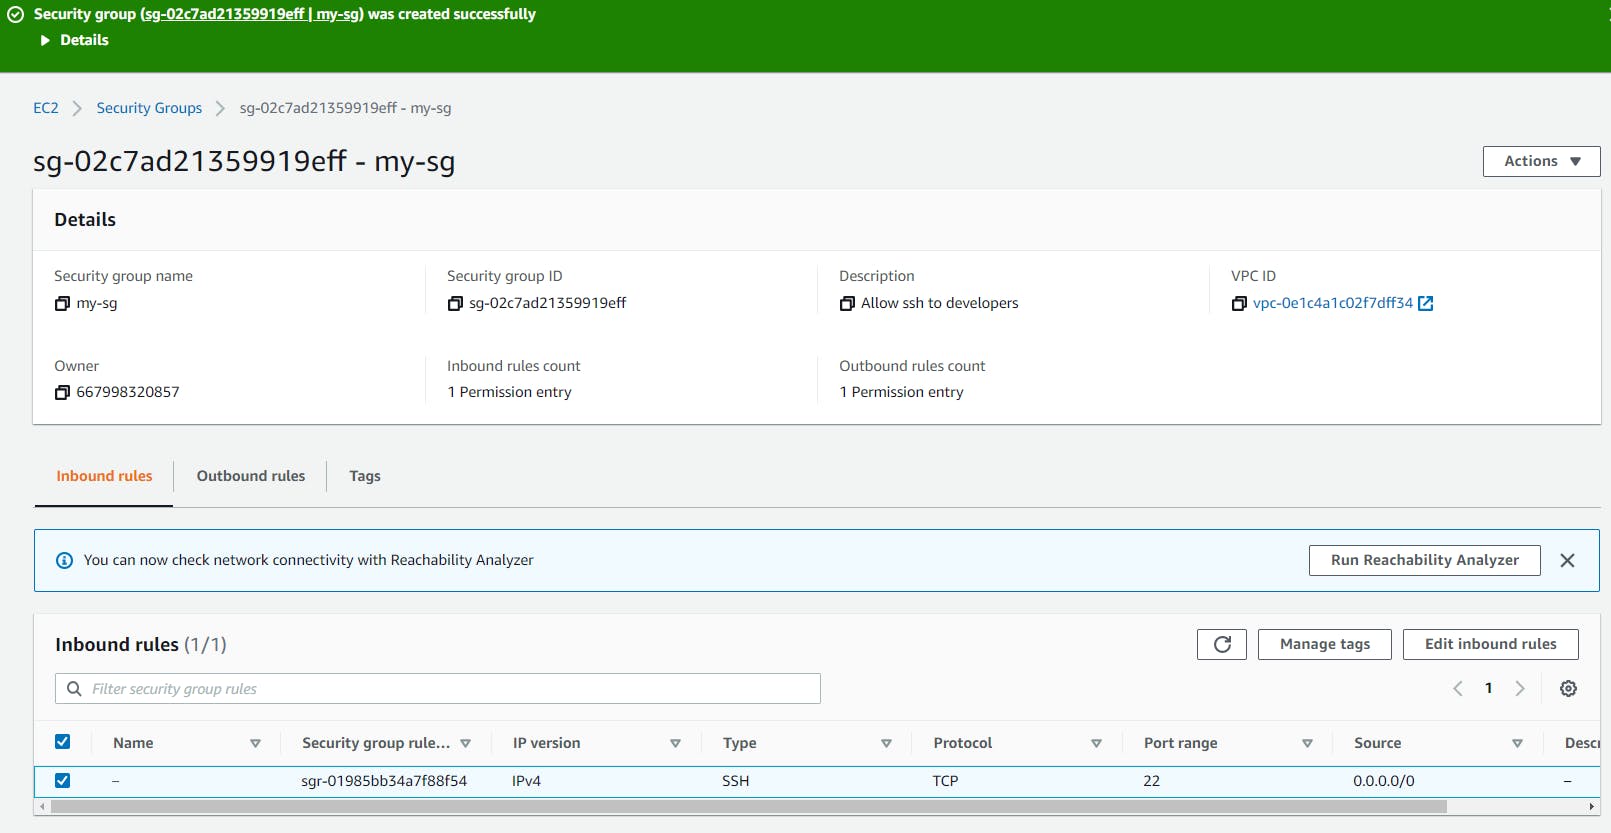
Now, we can attach this ssh security group to any instance. And, we can attach multiple security groups to instances.
Elastic/Static IPs
Whenever we start and stop the instance their ip gets changed. Therefore to handle this we can use elastic ips. Using Elastic IPs service we can create static IPs.
Let's understand how to allocate and attach the elastic IP.
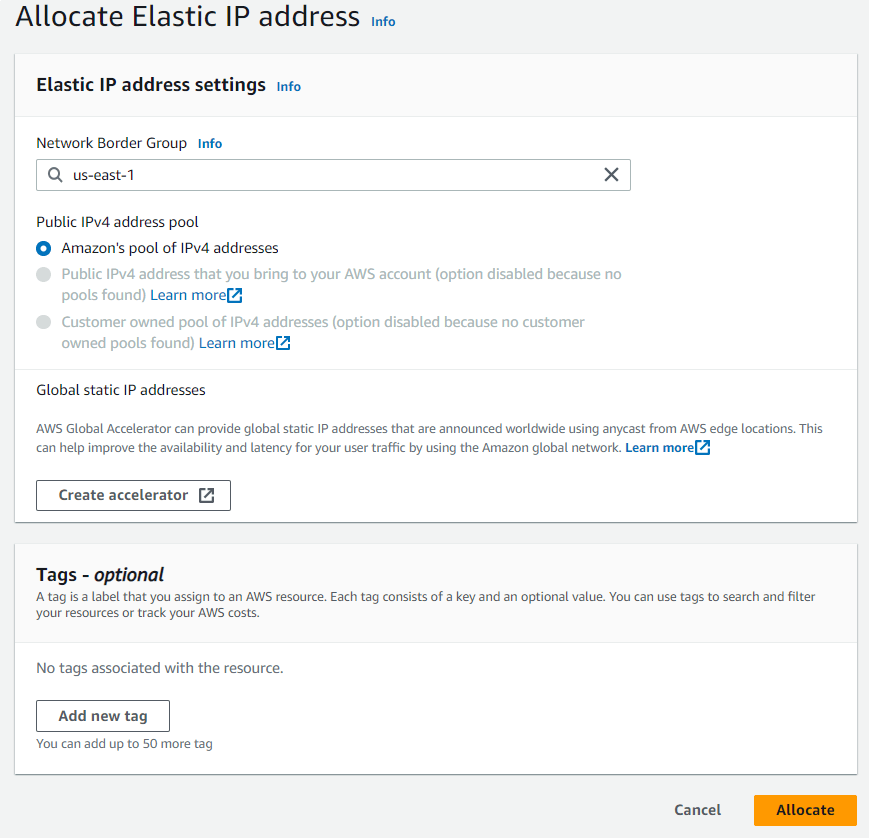
Step 1: Go to Elastic IPs service
Step 2: Click on Allocate Elastic IP address and add details.
Step 3: Click on Allocate and Your IP will be allocated.
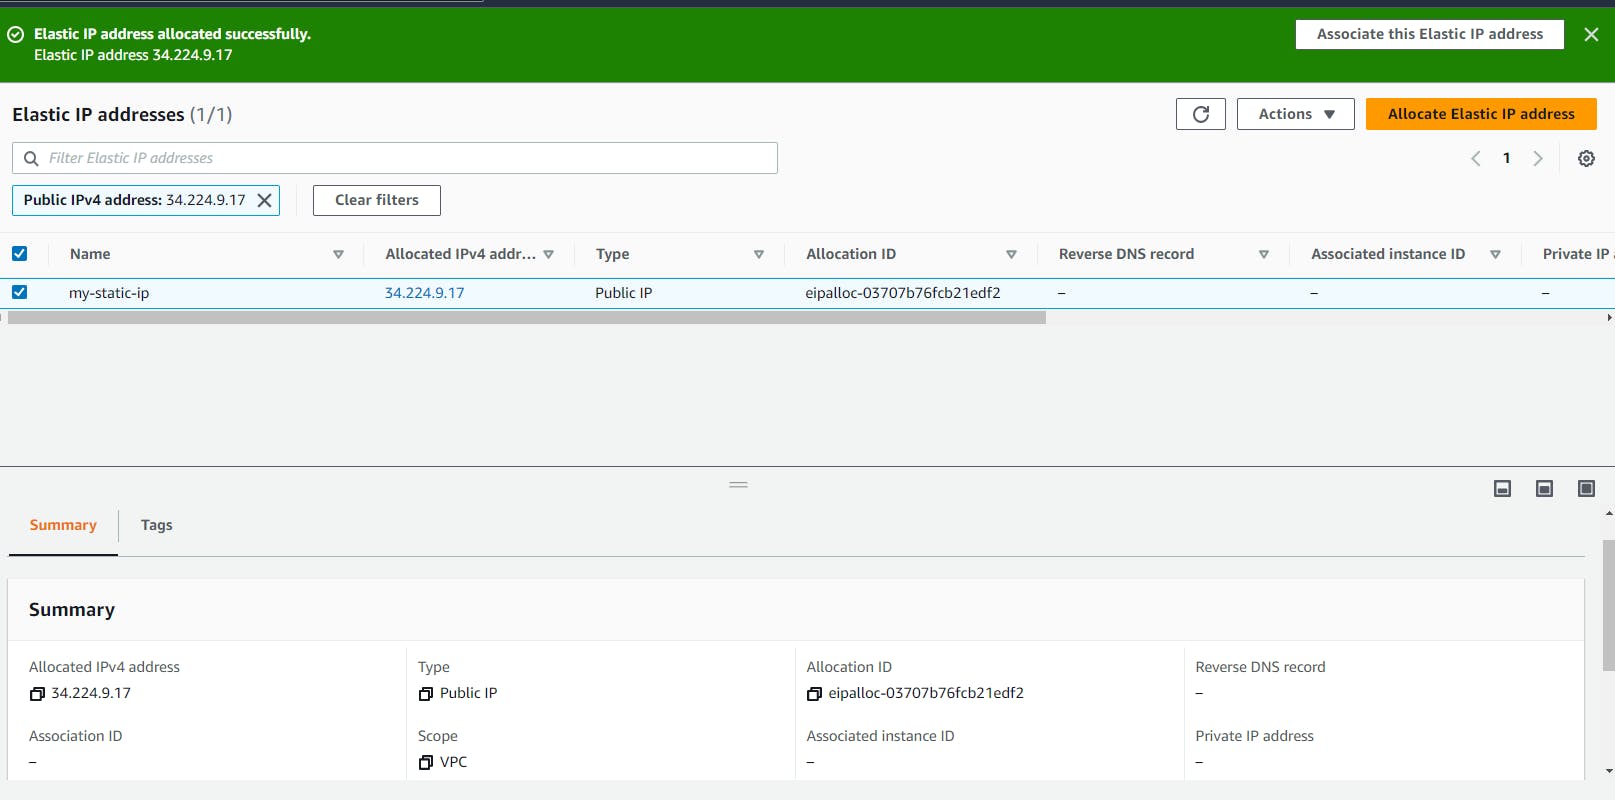
Now, this static IP we can attach to any instance.
Step 1: Create an instance or go to the created instance and check its IP.

Step 2: Go to Elastic IP service > Actions > Associate elastic ip address
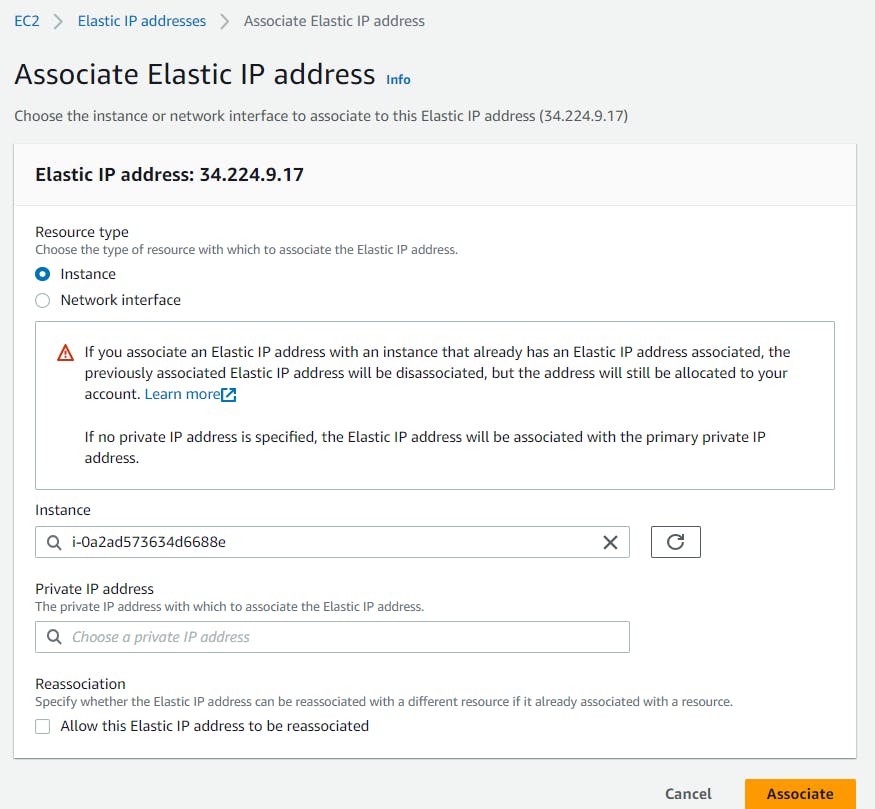
Step 3: Click on Associate. Your elastic ip is associated with your running instance.
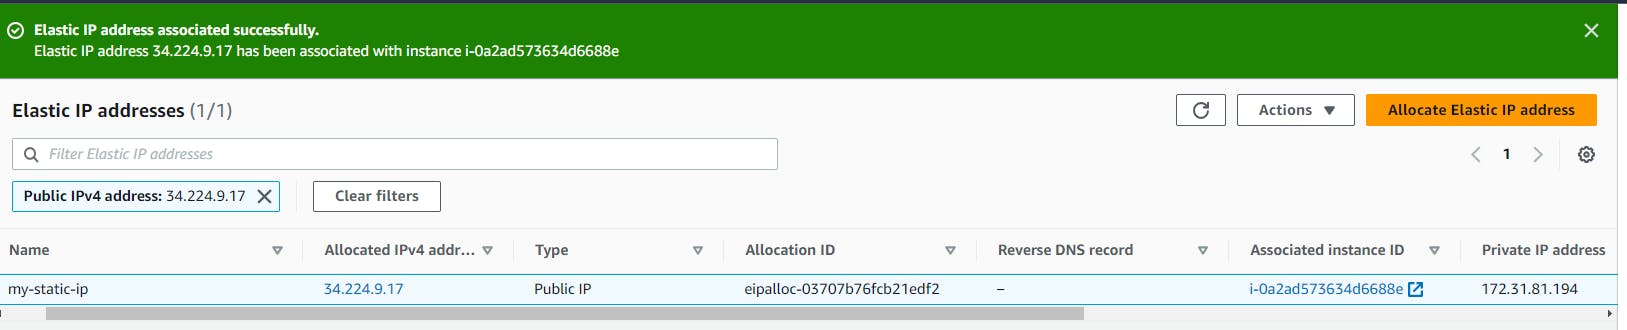
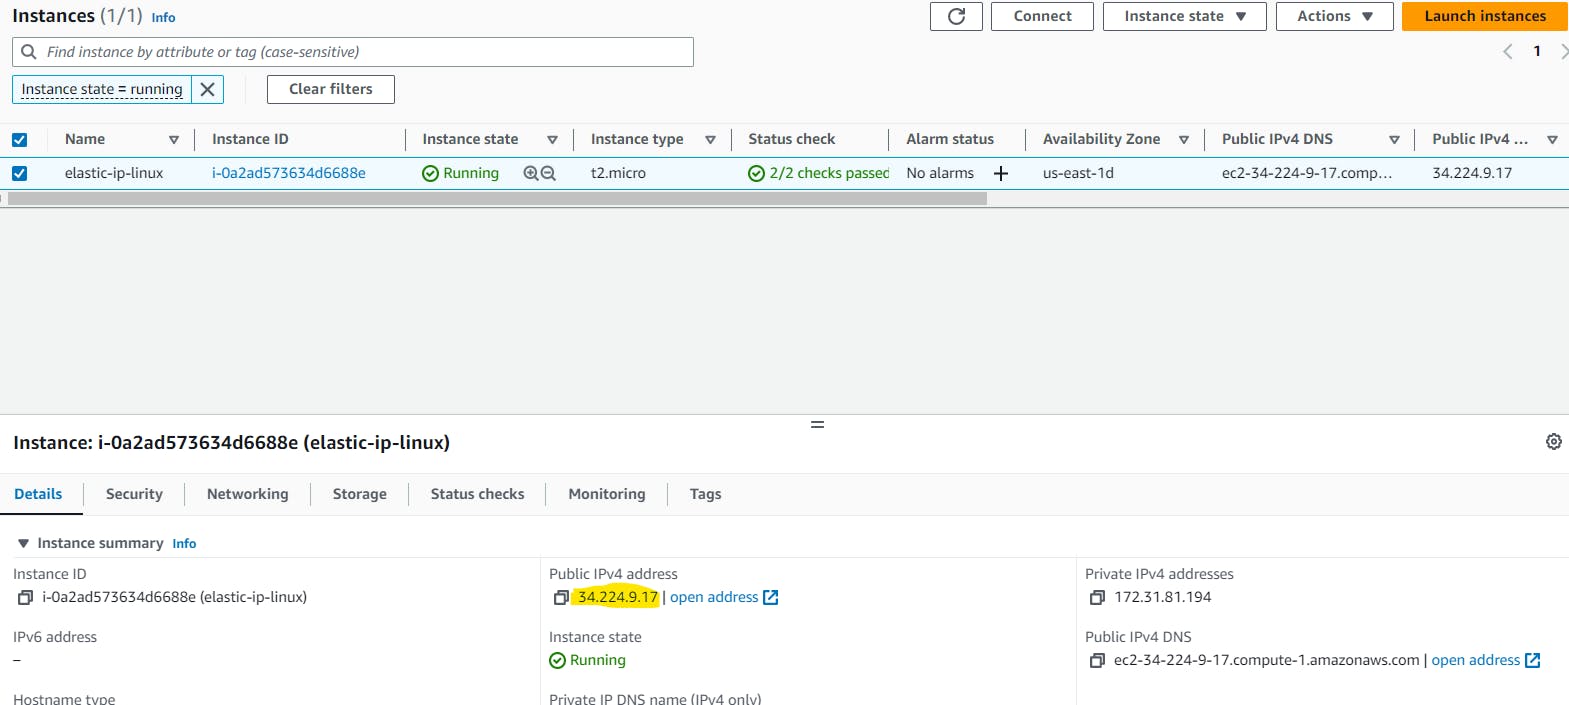
Step 4: Now go to your instance and check the instance ip now.
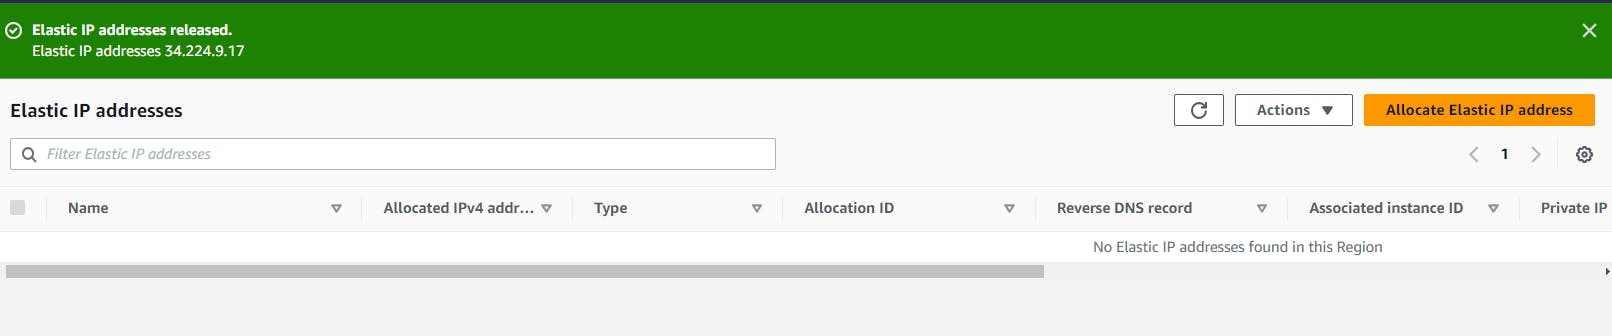
How to release/delete any elastic IP address?
First, you have to check whether your static ip is associated to any instance or not, if yes then you have to disassociate first and then you can release.
To disassociate, go to Actions in Elastic IP and then click on Diassociate Elastic IP address, click on Diassociate, and lastly click on Release Elastic IP addresses.

Thank you for reading this Blog. Hope you learned something new today! If you found this blog helpful, please share it with others.